
Master calculation groups in Power BI to eliminate duplicate measures and streamline your time intelligence calculations. Learn how to build dynamic, scalable data models in minutes.
What Are Calculation Groups in Power BI?
Key Benefits of Calculation Groups
- Reduce measure bloat by 80% or more
- Improve model performance and load times
- Simplify maintenance with centralized logic
- Scale enterprise dashboards efficiently
- Apply consistent calculations across all KPIs
The Time Intelligence Problem in Power BI
Traditional Approach: Measure Duplication
Most Power BI developers start by creating individual measures for each calculation. As your model grows, this becomes unmanageable.
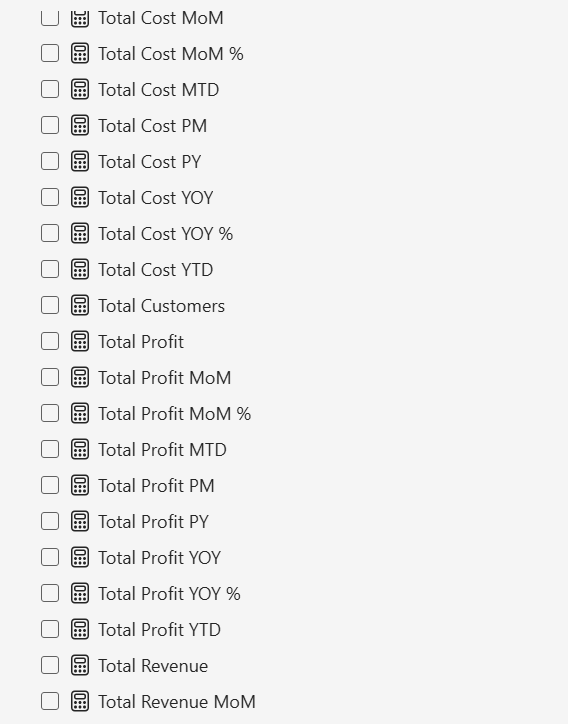
Why This Approach Fails
- Maintenance nightmare – Update logic in dozens of places
- Error-prone – Easy to miss measures when making changes
- Poor performance – Excessive measures slow down your model
- Difficult to scale – Adding new metrics multiplies the problem
How to Create Calculation Groups in Power BI (Step-by-Step)
How to Create Calculation Groups in Power BI (Step-by-Step)
Prerequisites
- Power BI Desktop ( October 2023 or later)
- Basic understanding of DAX time intelligence functions
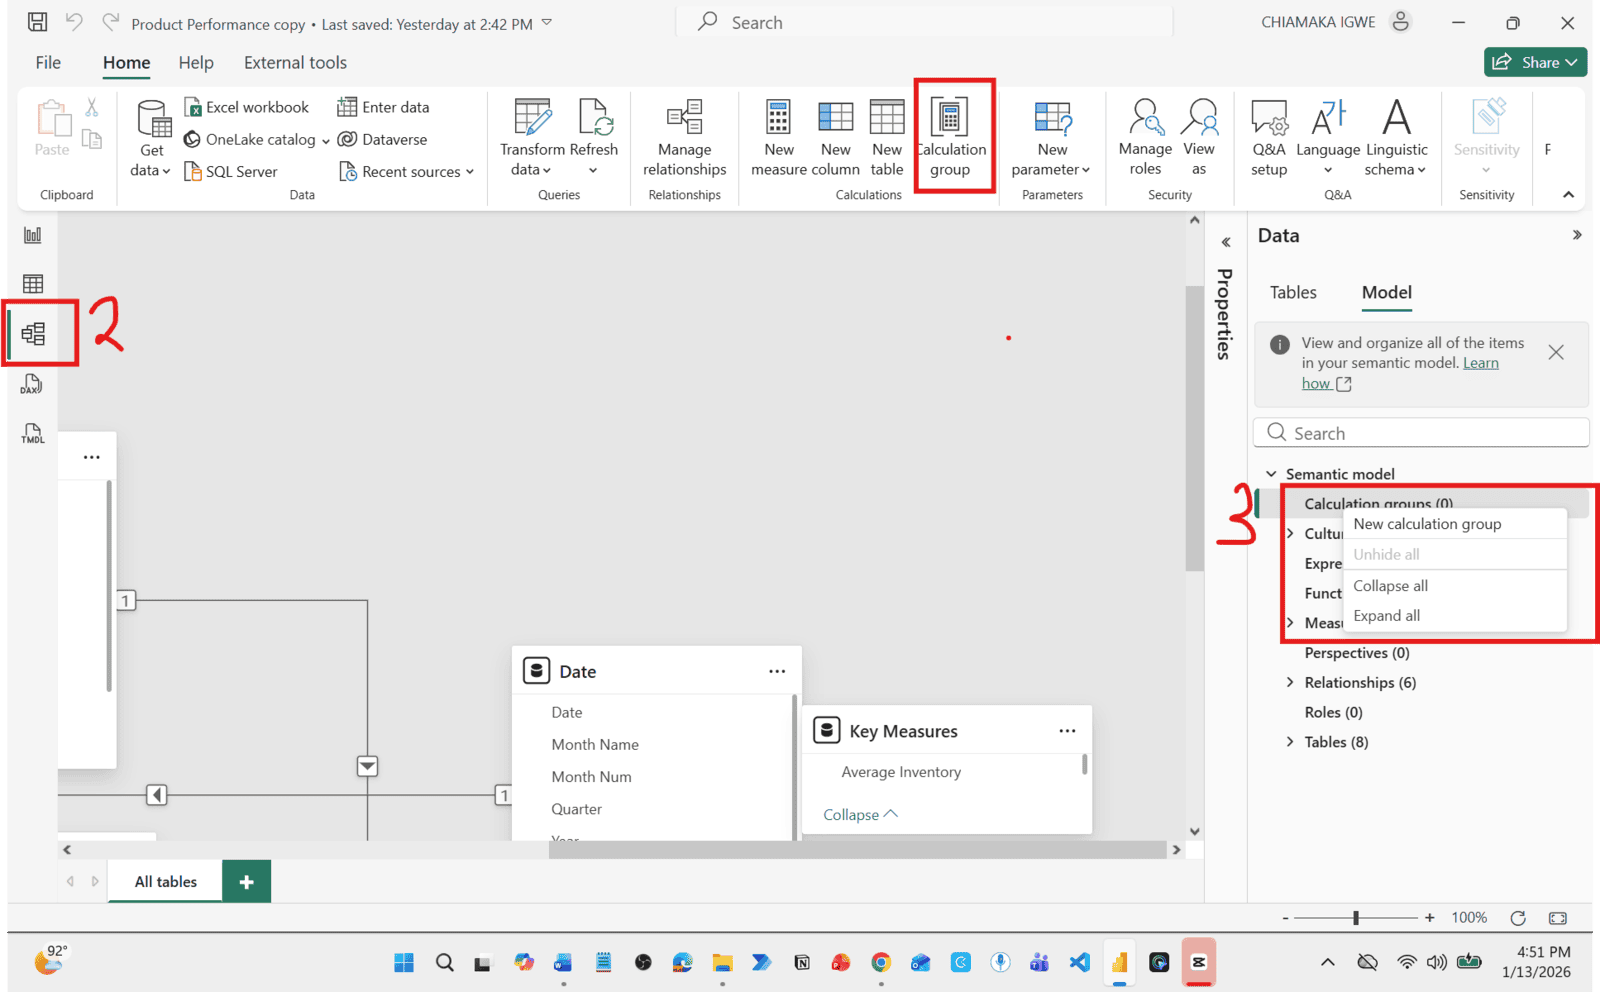
Step 1: Enable Calculation Groups
Step 1: Enable Calculation Groups
In Power BI Desktop:
- Open your Power BI report
- Switch to Model view
- Right-click in the model pane
- Select New calculation group
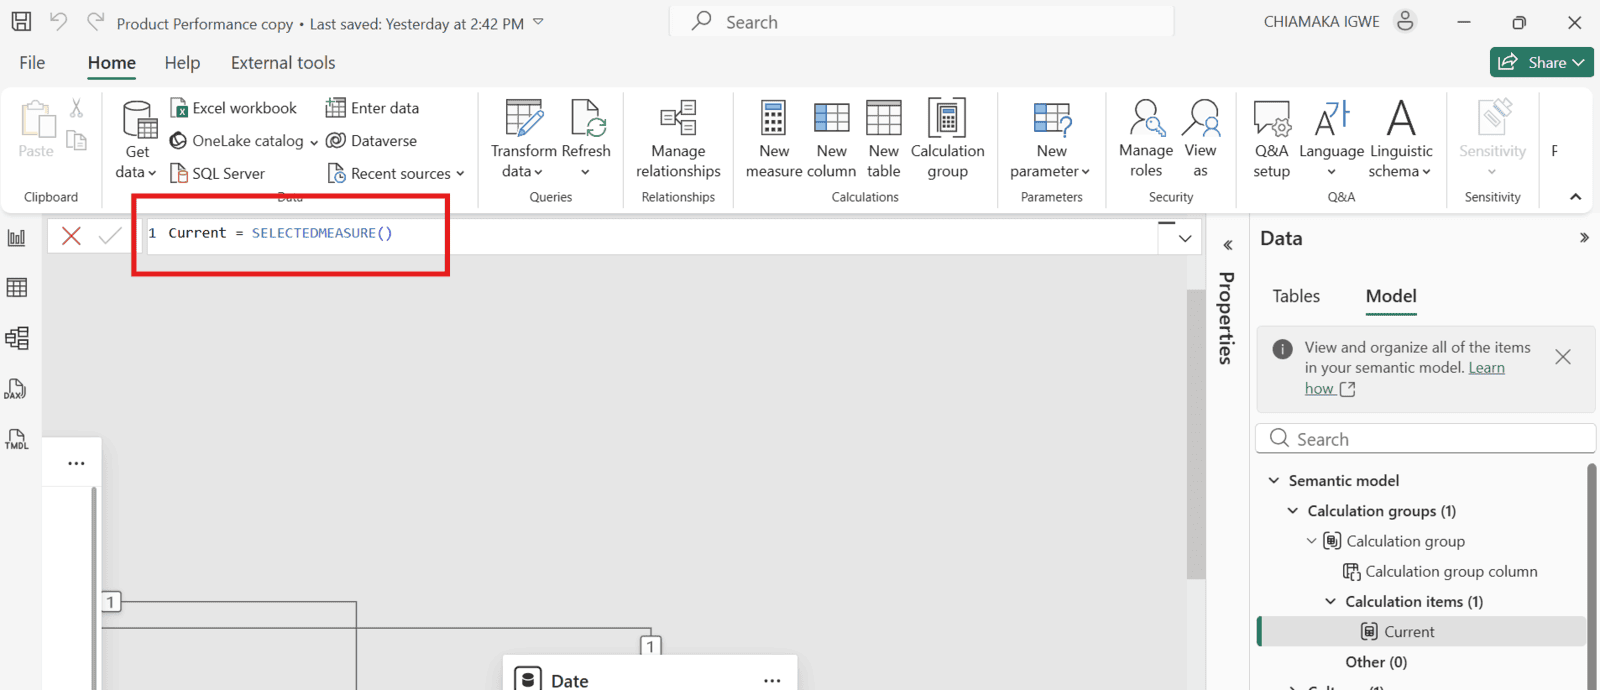
Step 2: Create Your First Calculation Item
Step 2: Create Your First Calculation Item
Power BI automatically creates a default calculation item. Configure it as your baseline:
- Rename the calculation item to "Current"
- Use this formula
Current = SELECTEDMEASURE()
Step 3: Add Previous Month Logic
Step 3: Add Previous Month Logic
Create a new calculation item for previous month comparisons:
- Right-click → New Calculation Item
- Name it "PM" (Previous Month)
- Enter this DAX formula:
PM = CALCULATE(
    SELECTEDMEASURE(),
    DATEADD('Date'[Date], -1, MONTH)
)
SELECTEDMEASURE() function makes this work with ANY measure you select.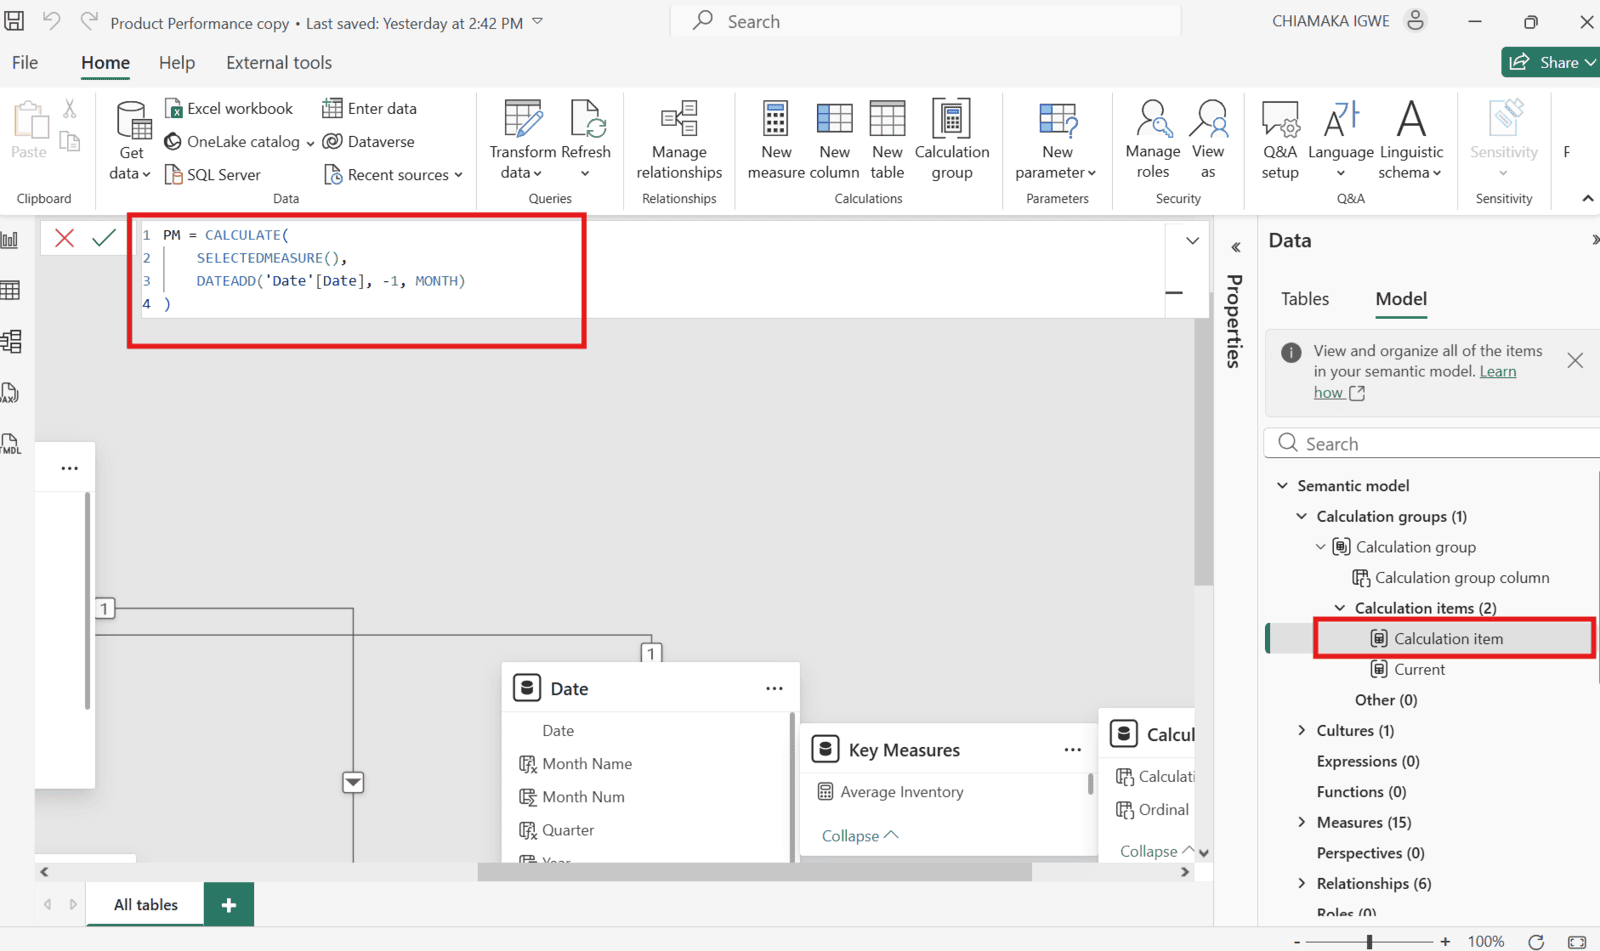
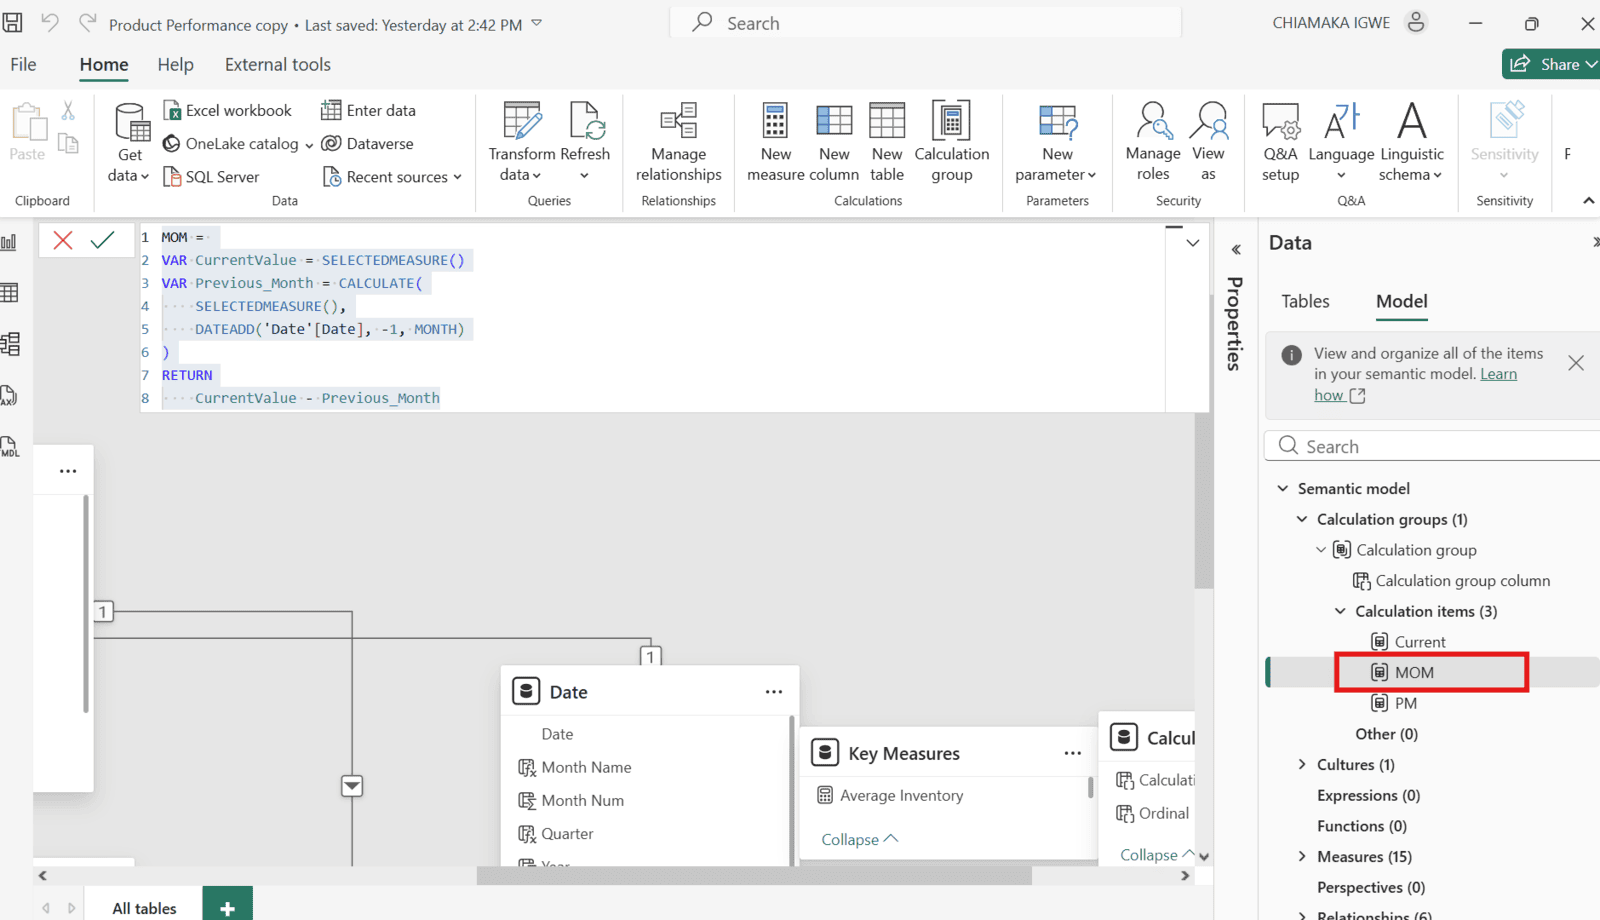
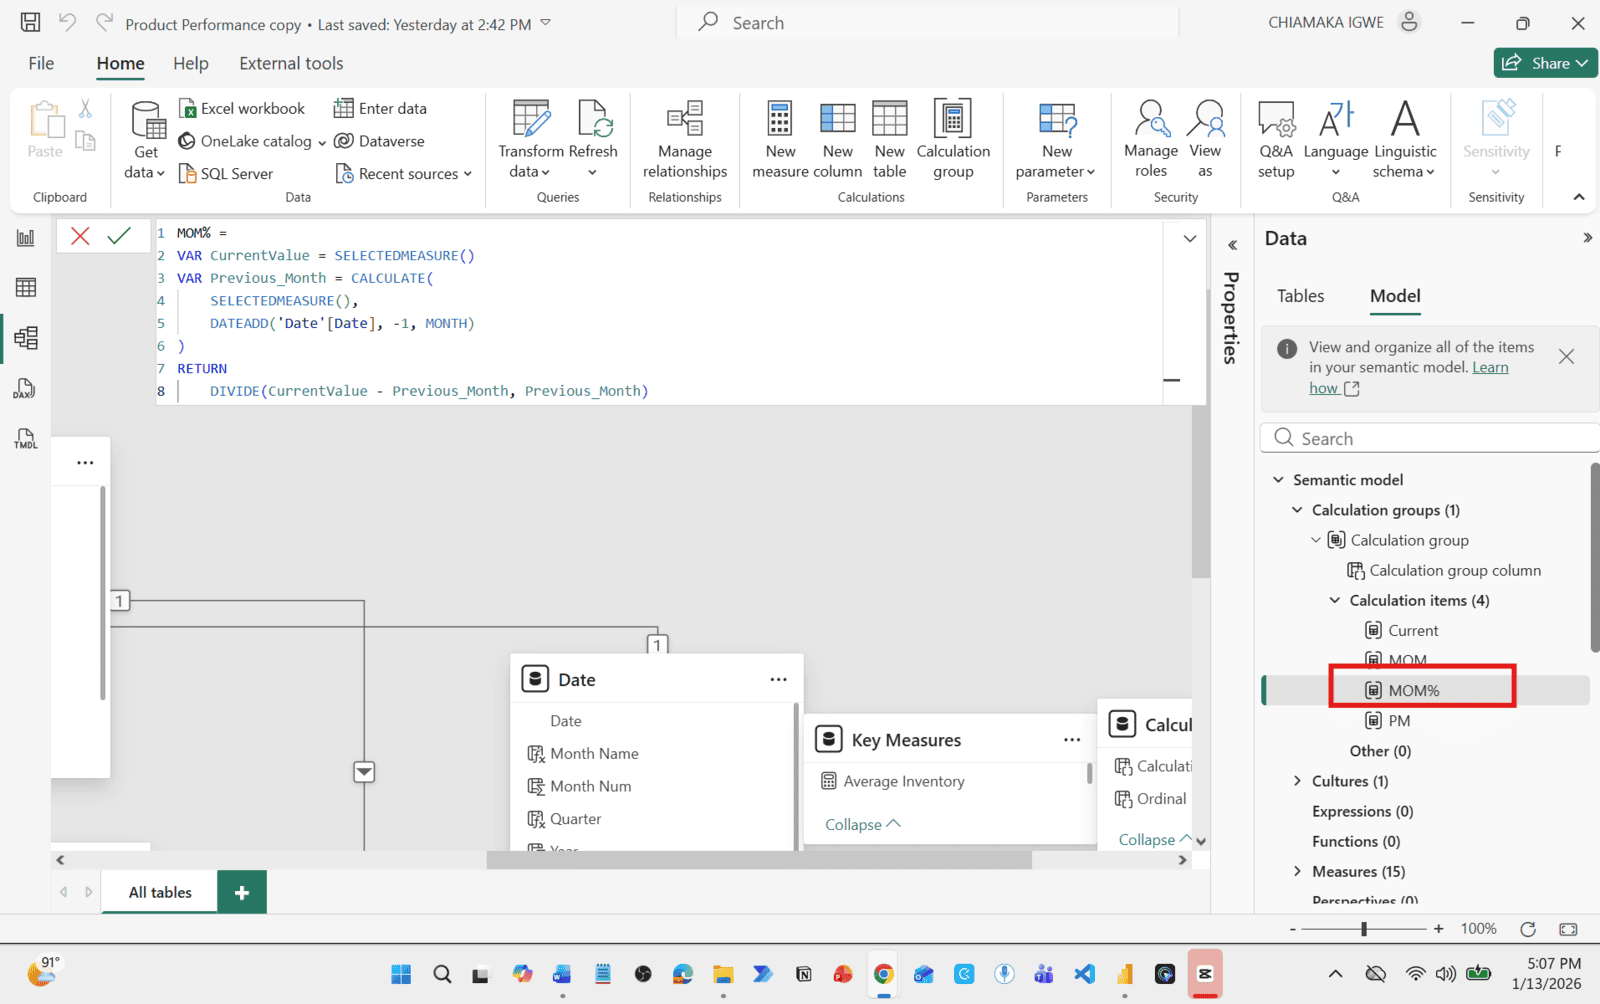
Step 4: Build More Time Intelligence Calculations
Step 4: Build More Time Intelligence Calculations
MOM =
VAR CurrentValue = SELECTEDMEASURE()
VAR Previous_Month = CALCULATE(
    SELECTEDMEASURE(),
    DATEADD('Date'[Date], -1, MONTH)
)
RETURN
    CurrentValue - Previous_Month
MOM% =
VAR CurrentValue = SELECTEDMEASURE()
VAR Previous_Month = CALCULATE(
    SELECTEDMEASURE(),
    DATEADD('Date'[Date], -1, MONTH)
)
RETURN
    DIVIDE(CurrentValue - Previous_Month, Previous_Month)
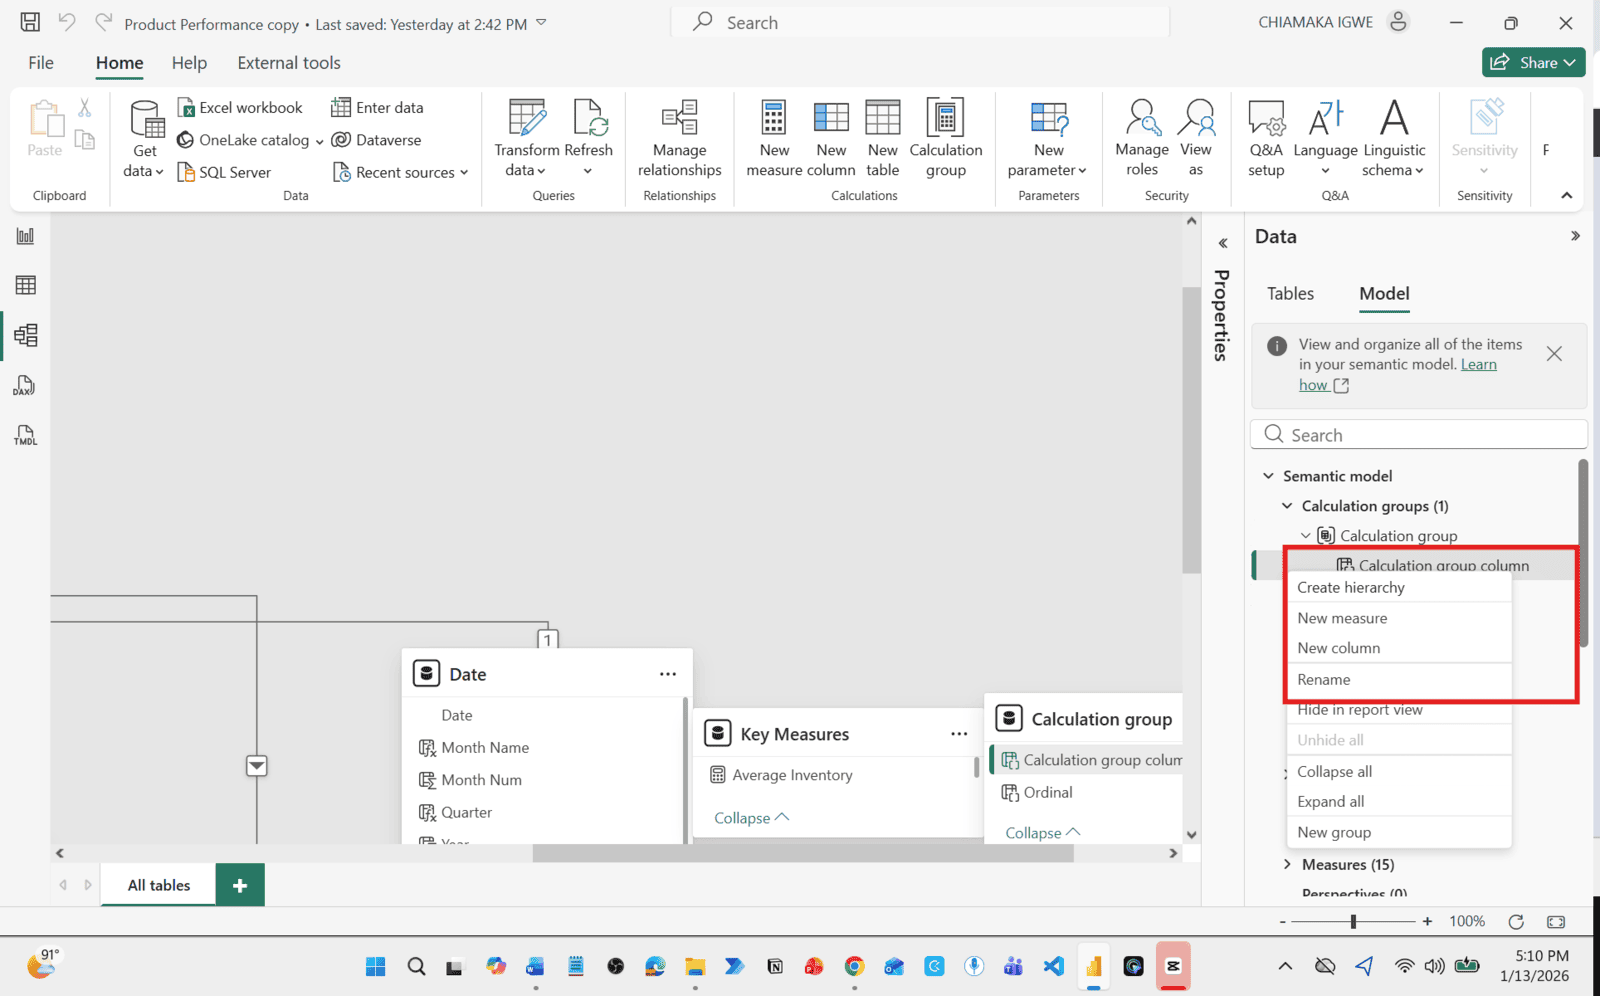
Step 5: Rename Your Calculation Group
Step 5: Rename Your Calculation Group
Give your calculation group a descriptive name:
- Right-click the calculation group column
- Rename to "Time Intelligence"
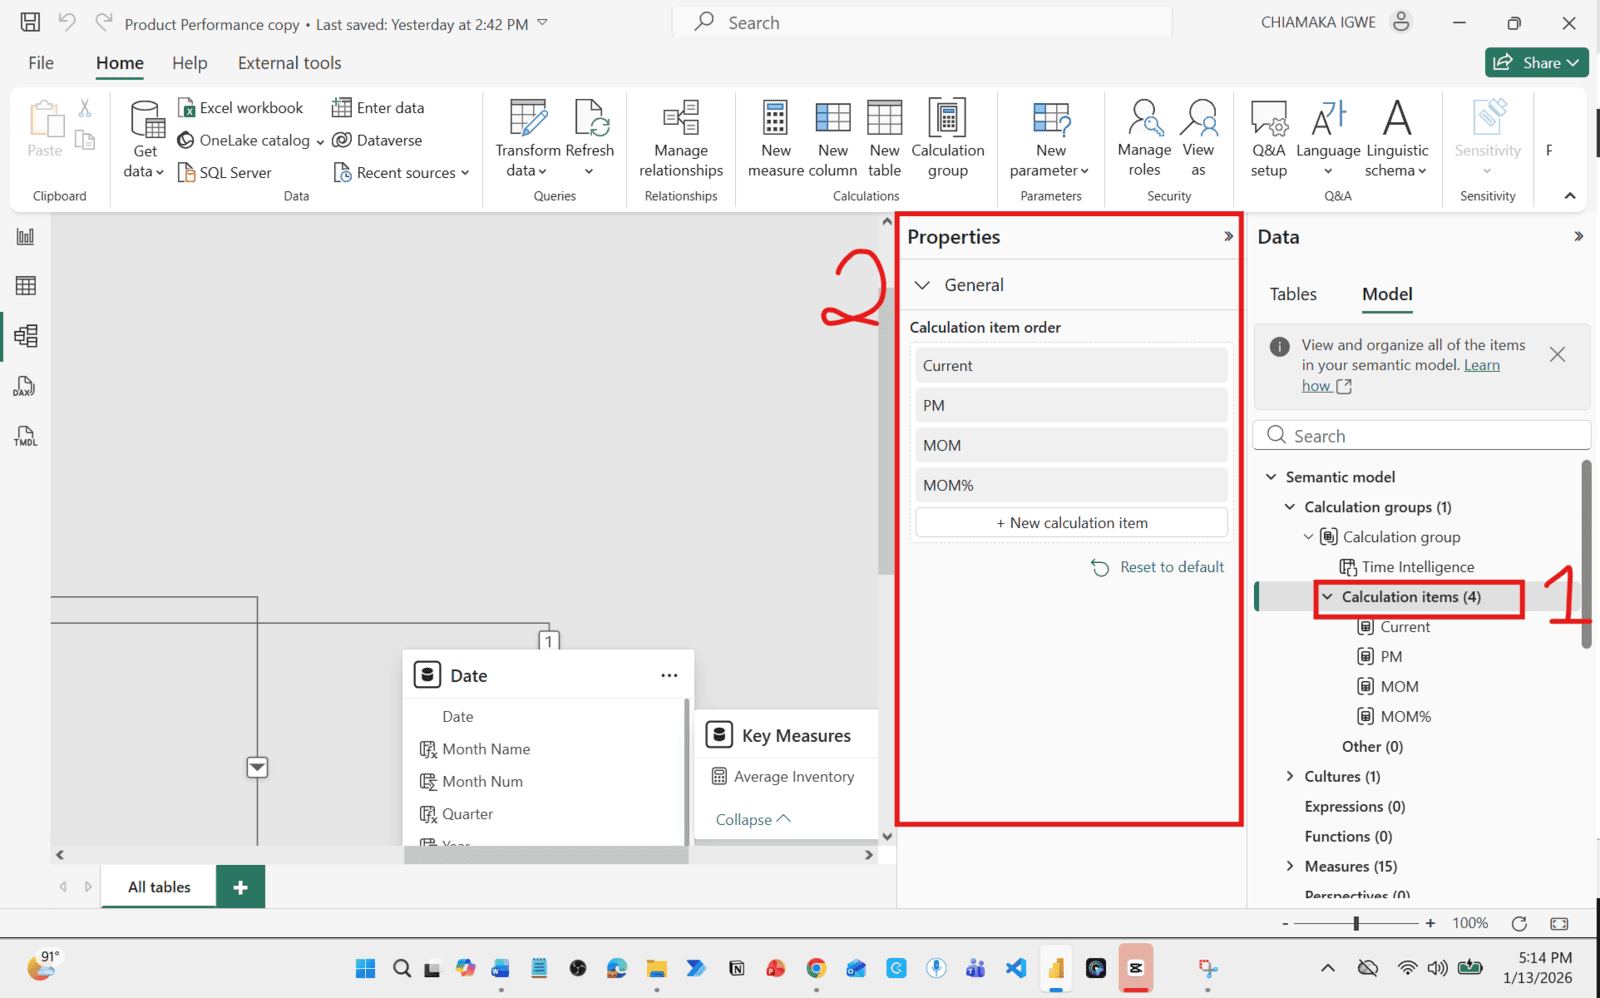
Step 6: Rearrange the Measures
Step 6: Rearrange the Measures
To rearrange the measures:
- Click on "Calculation Items"
- Open the "Properties" pane.
- Drag to arrange the measures in the right order
Using Calculation Groups in Power BI Reports
Using Calculation Groups in Power BI Reports
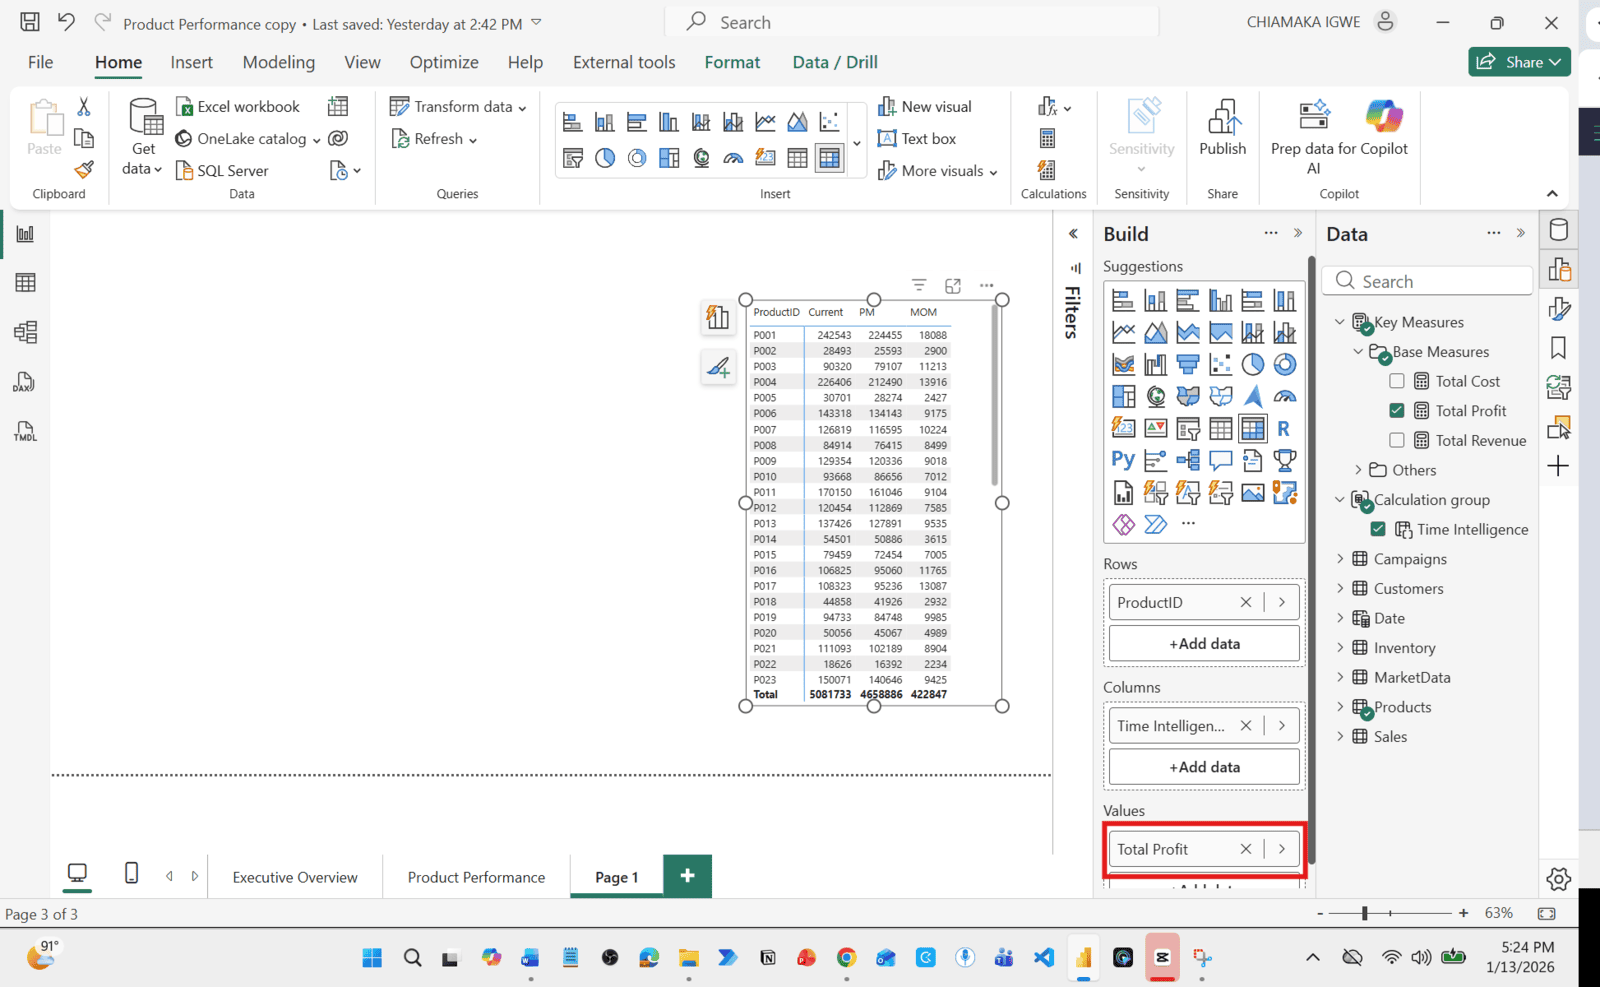
Matrix Visual Implementation
- Add a Matrix visual to your report
- Rows: Add your dimension (Product ID)
- Columns: Add your Calculation Group (Time Intelligence)
- Values: Add your base measure (Total Revenue)

Switch from Revenue to Profit:
- Simply replace the base measure in the Values field
- All time intelligence calculations update automatically
- Current, PM, MoM, MoM %, YTD all work instantly
Final Thoughts
Final Thoughts
Calculation groups represent a paradigm shift in Power BI development. By mastering this feature, you'll:
Build cleaner, more maintainable models
Reduce development time by 60-80%
Improve report performance
Scale to enterprise-level complexity
Establish yourself as an advanced Power BI developer
Whether you're building financial dashboards, sales reports, or operational analytics, calculation groups eliminate the time intelligence duplication problem once and for all.